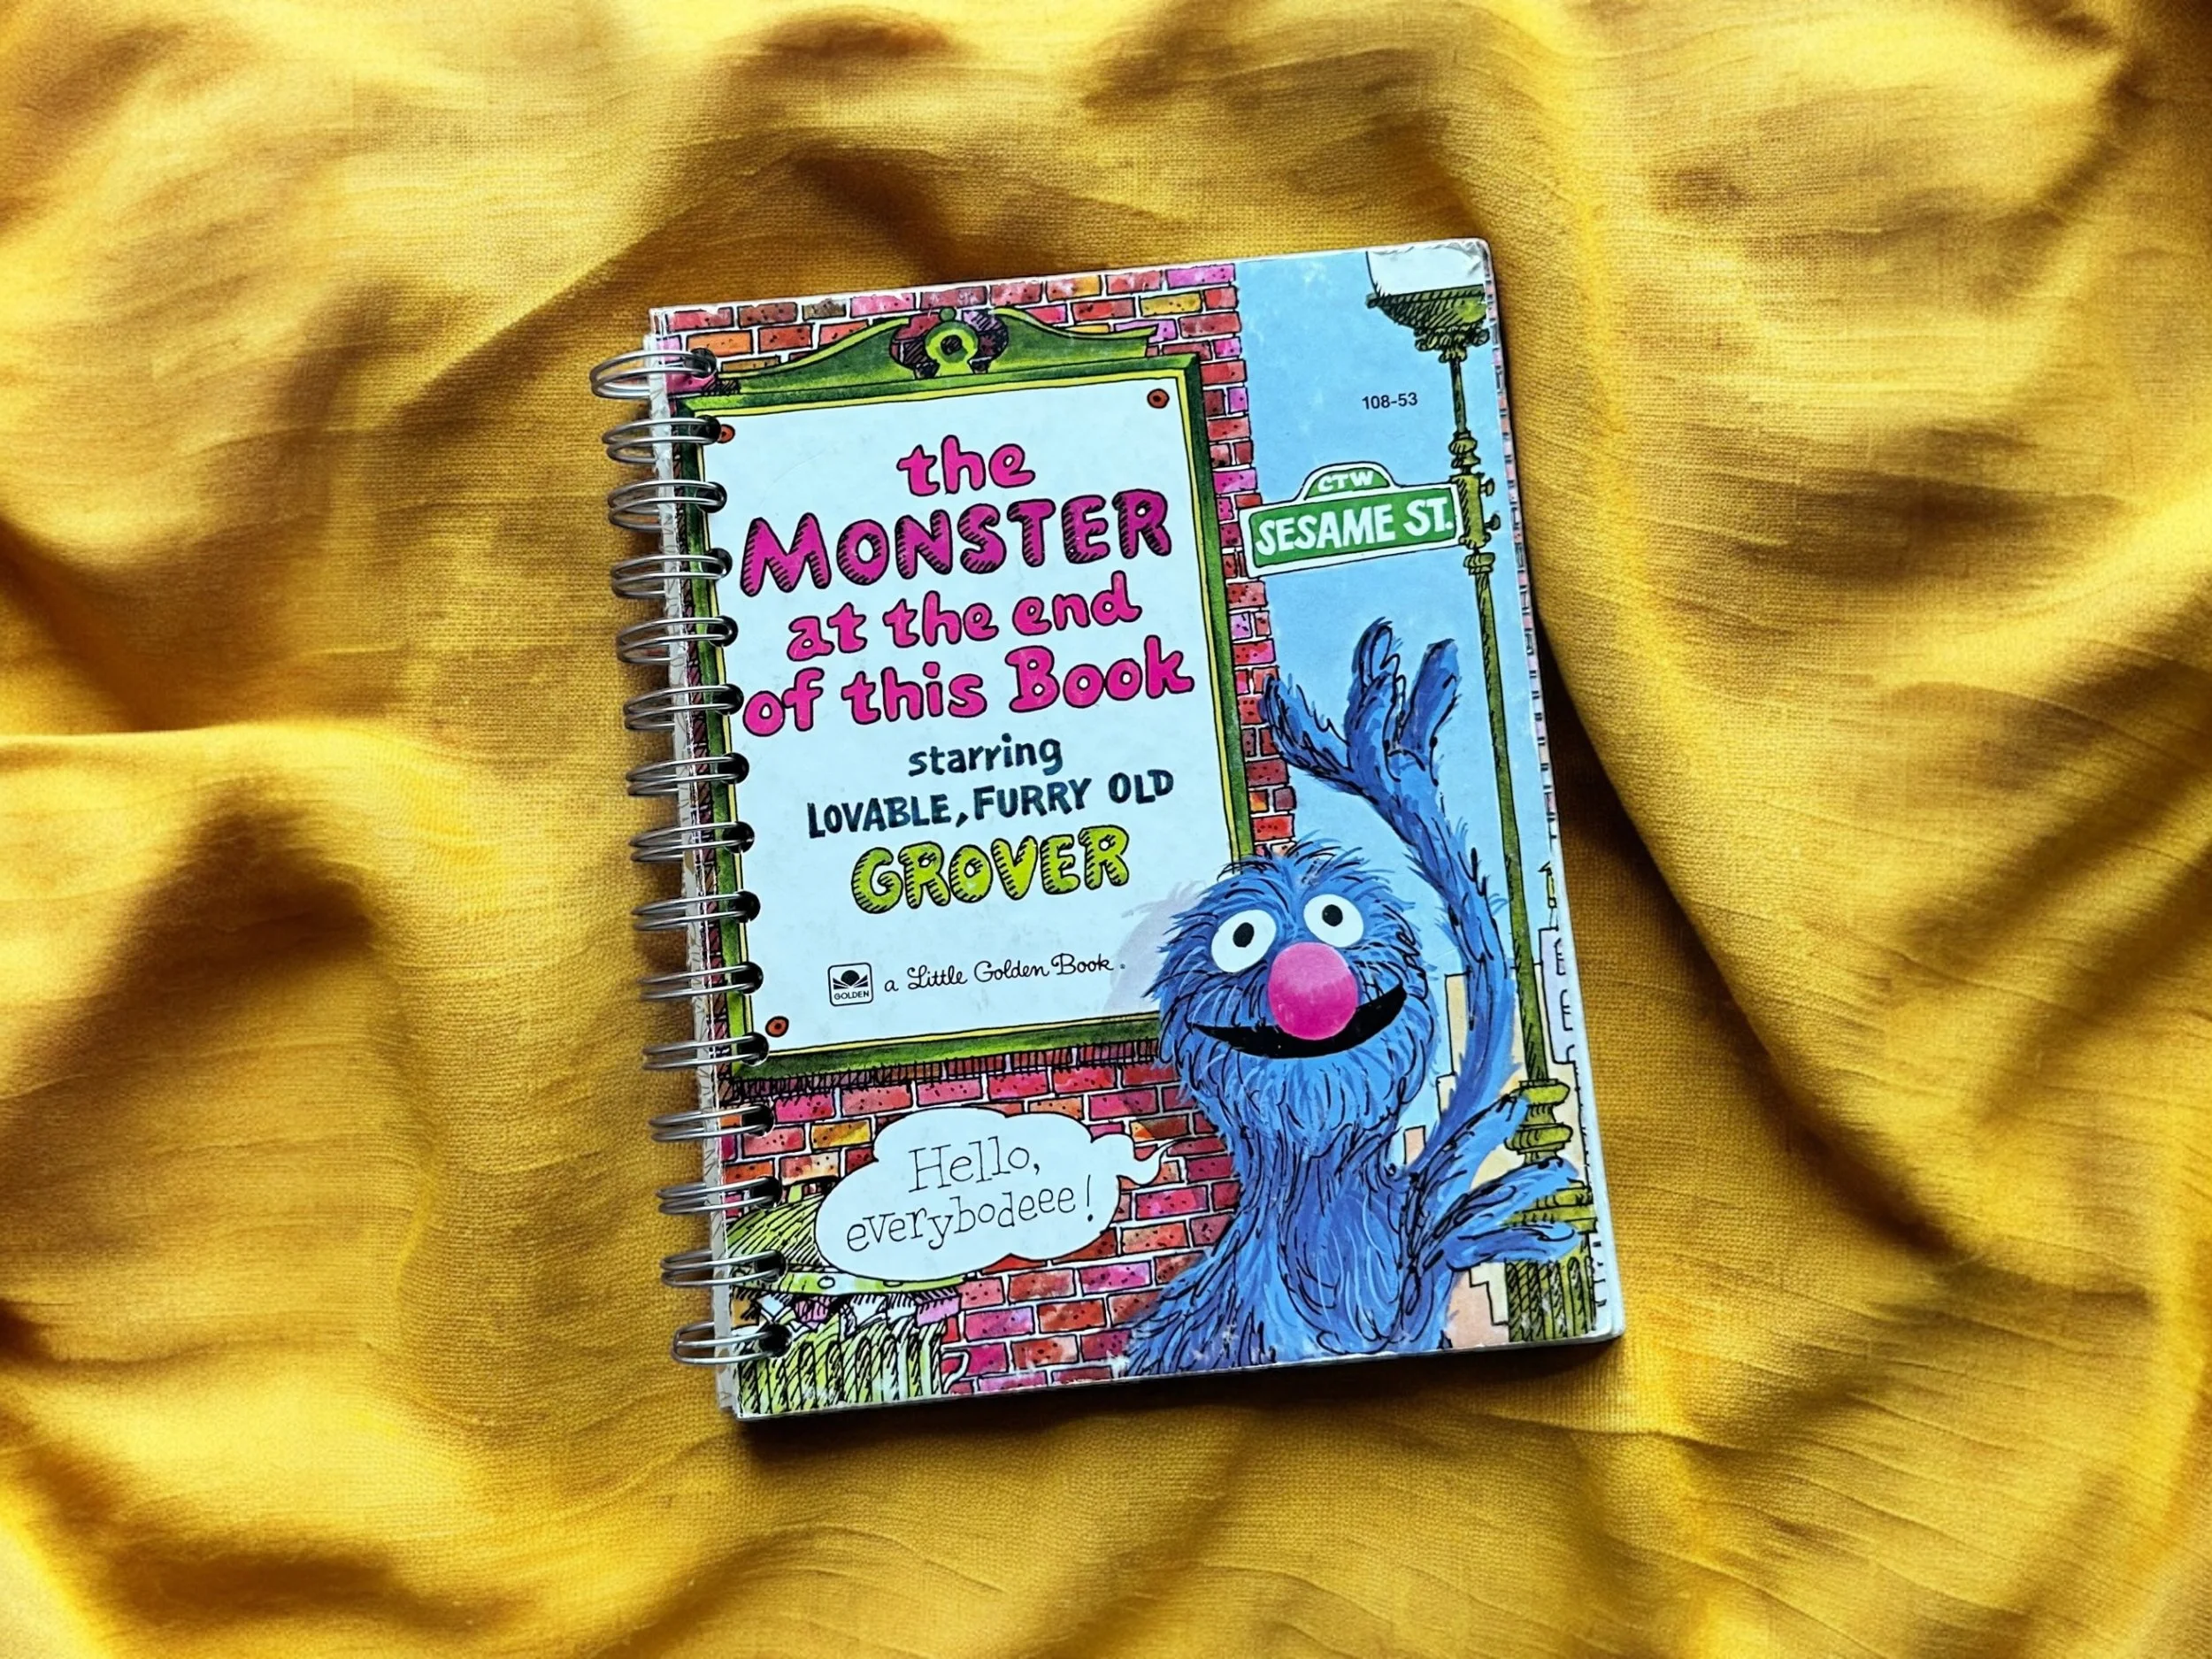
Trying to keep up with the pace

I don’t want to make a pace or anything for my crafting, but I am trying to create a behavior. So here I am on another day of working in the craft room and making something. The crazy part is that it is actually something I purchased at this year’s Bead and Button show. Why is that crazy? Because I have some baggies and items that I purchased last year that I have yet to use.

So here it is:


Crystal Necklace

The pieces are from Barton Crystals. Here is her etsy shop.

Nice and simple to put together. If you think of attempting it, I do recommend using a nylon pliers to close the prongs. I have cracked these kind of crystals before with just standard pliers.

Maybe someday I will try and commit to a 30 for 30 like Caitlin or a shocking 100 day craft challenge like April Bern. Let’s not get ahead of ourselves, though. First (or now second) start, make something and share it. Heck, step that up, make something for the shop, photograph it and load it. I have all the parts. I just need to put them together.

Advertisement

Returning to crafting

Ok, so I lost my groove for awhile. As I watch some of my crafty peeps try to regain their craftyness, I totally understand the push. I had a friend shaking her head at me as I talked about the different patterns/kits that I owned that I have yet to do. It is a kit! It should be easy to do! Yet there it is… sitting undone.

So, I have been looking a lot at the Wrapit Professional Series Duo. I have watched some videos where it is used, and I Iike it, but I have the Beadalon Tying Station. How can I think of getting a new tool without trying it out first on the one I have, so I did. There is a difference.

Here’s what it looks like while working on it. One thing I am not crazy about is that when you are working on a longer piece, you can really hook anything in. You end up working with the spongue portion under one of the areas that screw down, which is a bit of a pain. Also, it seems like a screw going through that screwed down area left little spongue pieces behind. Next, it is very flat, which made moving my two needles around the leather a bit of a challenge, especially at the end when things were tighter. I think having the higher raised area on the wrapit would make this easier.

The tying station might be fine for macrame type projects, but I would keep those to bracelets that are only time around the wrist.

In the end, I think I will pick up the second tool. It isn’t like it is breaking the bank to get it.

Here is the finished project:

I am going to try and be around more. I have done a bunch of purging of the craft room in effort to focus in on what I want to work on.

Happy crafting!

April’s Project Life

So along with everything else I try to work on, I like documenting things with Project Life. I subscribe to Studio Calico’s subscription service, which is pretty cool and gives me cards and embellishments that matches each month. Originally, I liked this because it helped keep me from over buying for my Project Life habit. Now I also like I for the colors and patterns along with some speciality items for the month. This is the Lisse Kit for April. I also work in the 6×8 format, since I was a little overwhelmed by the 12×12 format but, as I am almost full with the one book and only halfway through the year, I may try out the new 9×12 size next year.

This was the first page. I liked the big April lettering and was happy that there was a cool card to use as a background.

I put two cards on a 4×6 blank card to allow me to use two 3×4 cards for each. I know I have the plastic sheets for four 3×4 cards. I just can’t currently find them. These shots were for our anniversary dinner out.

I think I found a way to use these overlays. They seem to work well.

I finished two books this month. The Ruby Circle by Richelle Mead and Ghost Story by Jim Butcher. I also am trying to learn more about hand lettering. I am definitely a fan of what I see on Instagram, but this is going to take awhile I think.

This was a page of things I love. We danced at a assisted living place. They are a frequent crowd for us, and even though I have been a bit overwhelmed lately, it was nice to have some familiar faces. Plus, they always let us know that they enjoy us there, but are happy to get to bingo just after our show too. Also, love being able to document a rainbow on a card that includes rainbows. That’s my gorgeous and awesome mom, and my husband with three screens in front of him. That cracked me up.

I didn’t have too many photos to finish up April, so I took the time to use my new Fuse tool. That things is pretty cool, and now I can consider using shaker pockets.

Other side with cute puppies.


Hope you had a happy April!


Memorial Day crafting

This weekend has been pretty relaxing. I figured I would get myself up and make some items for the shop. I think four is a good number too. You can make all the pieces, put them together and photograph them and not hate yourself later for all the time standing and hunched over a paper cutter.

I think I am getting into the swing as well for retouching the photos. Cutting out the standing up book photo has saved massive amounts of time for retouching. I also have begun to keep all of my item descriptions on Google Docs, so it is easy to copy the base and make my alterations per item.

Can I tell you how much I love the T. Rex book? That thing is just cute. I hope others like it as much as I do.

Well, they are all loaded up now. Enjoy.

Working in a planner 


So I have found that I do benefit from having a hands on method of managing my finances, diet, excercise or just planning of the daily schedule. Sometimes an online management is enough and works (or would if it was used regularly like my diet method), but other times there is a desire and need to actually look at the plan and write it down. If you are going to write it down, then why not use a planner. 

There is such a craze out there for different kinds of planners. Some have enough space and detail if you are managing a family.  Others have only a little space for that and give you budgeting and notes space.  Some have a lot of color and others are very plain.  Some are really expensive and some are pretty cheap. I was aiming at something in the middle of it all. 

For my first try, I purchased Papertrey Inks: Moments Inked planner. I liked the price and the colors.  I like some of the dies and the stamps that can go along with it, although I need to use the stamps that I have already purchased (there’s that budget aspect). One thing I am having an issue with is that it’s difficult to write on the left page next to the spiral. The spiral is so large that you almost have to push it down to be able to have any kind of legible handwriting. I also thought that the daily pages we’re going to be great for journaling, but I think I get more out of the weekly pages. I miss days at a time and when I try and go back to log things, I realize I had a real plain day and don’t feel that there was anything to log about. 

I think when I choose my next planner, but I may go for something a bit thinner with only weekly pages and the option for other kinds of journaling pages. I still want color though. Lots of color. I might look at the ARC system and get some pages from Cocoa Daisy along with basic pages. 
I guess it is all a learning process of seeing what fits and what you can keep up with. I like electronic to keep up with work and sharing calendars with my husband, but I really do think there is something to the awareness of using your hands and creativity when looking at the week ahead. 

Any thought out there for your experience?

New items in the shop

Well, it took some work, but I have the seven new journals made, photographed, retouched (which I previously posted about), and loaded into the shop.

I have also updated some journal descriptions to include the types of pages and how many along with more details about the book that the journal was made from. I hope it allows my buyers to know more about what they're purchasing.

I usually try to get used books for my journals, but I could not find a used frozen book. Therefore I had to use new ones, which raises the price a little bit but that allows the book to be out there now. I really do prefer using used ones. I kind of felt guilty cutting it open.


Hope you like them.


So I have been thinking, and that’s a scary thing

As I am working on adjusting the latest photos for some journals that were put together, I am struggling on adjusting the photos from where the journal is standing up like this one.

IMG_1734

I spend a fair amount of time altering the photo in Pixelator, and get to a reasonably better photo, since it hides my ugly light box.

Image 5-11-15 at 5.53 PM

But then comes the question… Do I need to have this kind of photo to list my journals? Am I wasting time when photos of the journal lying flat and others of it open are enough?

What do you think? Am I wasting time?

Getting back into the swing of things


It’s a new year. Sure, it is April (and almost the end of that), but this is a new year. I am going to refocus myself back to my crafty self. I am going to come back to sharing with you and getting items into my etsy shop.   This is it. This is my announcement to the world. Ok, that’s getting a little dramatic, but I am going to do it. 

More to come. 

Current new craft – loom knitting

So, I have been introduced to a new craft. Loom knitting. I was never one to be able to keep my interest with crocheting or knitting with needles, but this is something I can focus on. This current scarf is so soft and the double knitting fashion doesn't allow me to overly tighten my stitches like it does when I am knitting a hat, but that is still awesome and will just take more practice.

Ha! I can finally visit the yarn stores and aisles with a purpose. This rocks.


And back to knitting. 🙂


Not so pleased with Sew Ribbon tool

I have to say that I do like the We R Memory Keepers Sew Easy tool, but I am not thrilled at all with the Sew Ribbon tool. I was just going to add some detail to a nicely planned card. What could be harder than laying the tool over the card, having the magnets line itself up and punching the easy to use cutter through the paper. Yeah… Right. Damn. So, I have now mangled the bottom of my card, as the tool has a hard time fitting into its own guide let alone punching through paper. I thought that maybe it was the paper and not the tool, so I tried some cheap, thin paper. Nope, still the tool. Boo and ugh. Guess I will have to redo a card later.

20120505-003905.jpg